Vyrii
Colour Your Own Robin Hood's Bay Card
Colour Your Own Robin Hood's Bay Card
Couldn't load pickup availability
Share
Create your own piece of the coast
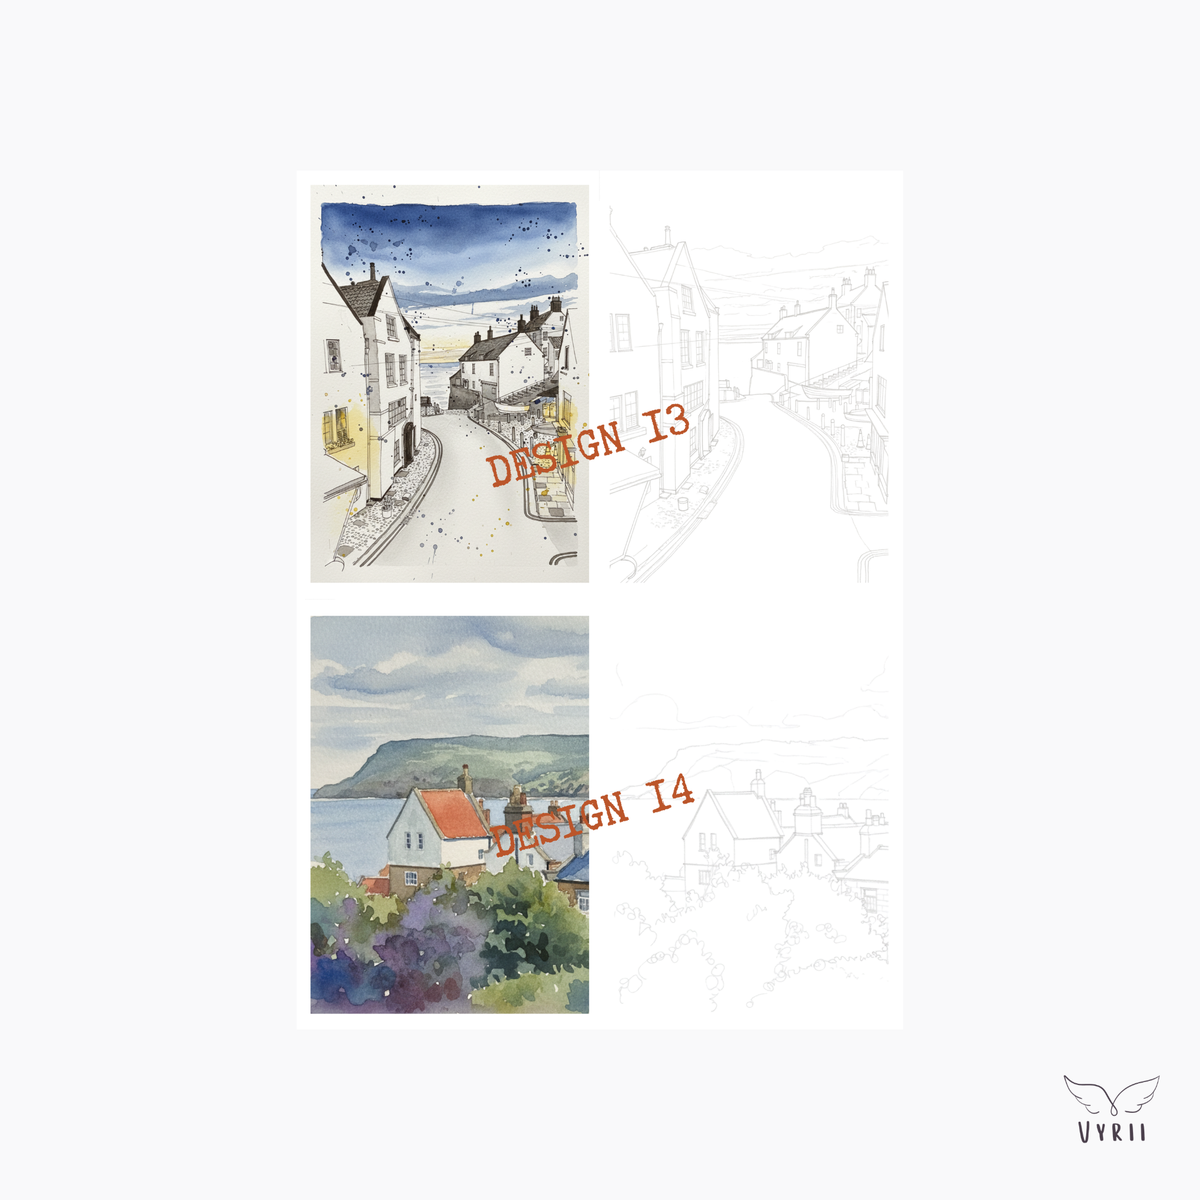
For anyone who loves to get creative, this set lets you bring your own colours and style to these scene of Robin Hood's Bay. Each card features a detailed outline of the village's winding streets and cottages and seaside, printed on professional watercolour paper, and ready for you to fill in with paint, pencil, or pen exactly as you imagine it.
One for you, one for a friend - colour one to keep and gift the other, or share the set and create together.
Printed as a single flat sheet (not folded), so you have one uninterrupted surface to work with.
Need a little guidance? We've included a fully coloured version of the same illustration alongside your blank card — a helpful reference for colour choices, shading, and inspiration if you're not sure where to start.
What's included:
- One blank card with a printed line-art outline of Robin Hood's Bay, flat and unfolded
- A coloured reference illustration to guide and inspire your own design
- 2 envelopes
- Printed on high-quality watercolour paper, perfect for paint, watercolour pencils, or fineliners
Presented in cello bag.
Whether you're painting a thoughtful, personal gift for someone or just want a relaxing creative activity for yourself, each card gives you a beautifully detailed starting point, the rest is up to you.
What You Will Need to Start
This guidance is available via the link on the pack
The Essentials: Watercolour paints (or pencils), a Size 8 and a Size 2 round brush, low-tack masking tape, a mixing palette (an old ceramic plate works perfectly!), paper towels, and two jars of water.
Optional Extras (depending on your style): A white pigment ink pen or white gouache (for bringing back crisp white highlights over dried paint), and a waterproof black fineliner pen (we recommend a 0.1–0.3mm nib for delicate, intricate line work, or a 0.8–1.0mm nib for a bolder, more graphic style).
1. Prepare Your Coastal Studio Before you begin, secure the edges of your painting sheet to a flat board or table using masking tape; this will keep the paper nice and flat when it gets wet. Gather your paints, a mixing palette, some paper towels, and two jars of clean water (one for washing your brush, one for mixing fresh colours). If you are buying brushes for the first time, a Size 8 Round (for skies) and a Size 2 Round (for fine details) are all you need! If you are using pencils, get your favourite set and find a comfortable, well-lit spot.
2. Plan Your Palette Take a moment to decide on your colours. You can stick to the traditional, moody blues and greys of the North Sea, or experiment with a vibrant, imaginative palette! A little colour theory goes a long way, try mixing primary colours to find your perfect coastal shades, or use complementary colours (opposites on the colour wheel, like blue and orange) to make certain elements pop.
3. Build Your Layers If using watercolours or wet mediums, start with light, watery washes for your skies and backgrounds. Watercolour is all about transparency, so it is always best to work from your lightest colours to your darkest. Be patient and allow each layer to fully dry before adding the next; this prevents your beautiful colours from mixing into mud. Remember, watercolour has a mind of its own: if the paint blooms or you make a "mistake," celebrate it as part of your unique artistic style! Don't feel overwhelmed; all you need to do is enjoy the process.
4. Add the Final Details Once your larger areas of colour are completely dry, take a fine-tip brush to pick out the delicate details, such as the brickwork of the cottages or the texture of the coastal grass. If you find you need to bring back some bright whites after the watercolour is already on the paper, consider using a white pigment ink pen, a white pastel pencil, or some white gouache to add those crisp highlights. If you prefer a more illustrated or sketchy style, this is the perfect time to experiment with sharpened pencils or a fine art pen to add those final, characterful touches!
5. The Finishing Touches Ensure your artwork is completely dry before gently peeling away the masking tape at an angle to avoid tearing the paper. If the paper has buckled slightly during painting, place it between two clean sheets of paper under a heavy book for a day or two to flatten it out. Your Whitby masterpiece is now ready to be framed!
Paper Quality: Professional 200 GSM Cold Press Watercolour Paper
Recommended Mediums: Perfect for watercolour paints and watercolour pencils. The versatile surface is also beautifully suited for standard colouring pencils, acrylics, and gouache.